Weekly fitness tips will return in a couple months!
Why I Don’t Call it a “Cheat Day” and Tips on Healthy Nutrition Goals


By Molly Magunga, MS ATC, CPT, CES
Hello everyone! This week’s “Fitness Tip of the Week” is about being successful with healthy nutrition goals. I believe the current focus on diet plans or restricted eating has created a lot more feelings of failure than success. There are too many ways to feel like you have failed or “cheated” on diets. If you are following a diet that is so restrictive that you need to “cheat” the plan to be keep your sanity, it isn’t a sustainable plan long term. The term “yo-yo diet” exists because of this. You start a diet and it seems to work. The moment you stop, you gain the weight back. You then restart the diet again or try a new one. Up, down, up, down. This doesn’t need to be your life forever. If you develop healthy nutrition goals that involve a well-balanced plan, you won’t need cheat days and you won’t fail.
No More Cheat Days
There is a difference between dieting and developing healthy eating habits. One is sustainable long-term and the other isn’t. One has the goal of making the body healthier and the other’s goal is weight loss in a healthy or unhealthy way. You can sacrifice dieting and work towards healthy nutritional goal and still lose weight. When you ditch dieting and work on other all health, you will no longer need cheat days.
The thing with dieting is that most diets are an all-or-nothing set up. A lot are set up where you cut out or severely limit whole food groups. With this mentality, you are so lacking with what your body needs that it leads to binging (over eating). This also leads to a ton of guilt.
“I can’t believe I hate that whole pizza.”
“Why did I even buy that ice cream cone.”
“I am going to have to workout twice a day all week to make up for this week.”
The sad part is that that is exactly how diet culture wants you to feel. Certain diets makes you think that there are good and bad food groups. The truth is that no food is bad in moderation and this over eating is usually because your body is so lacking for what it needs that it over compensates.
Success with your Healthy Nutrition Goals
We know that diets aren’t healthy or sustainable in the long run. If you truly want to live healthier and maintain a healthy weight, you have to play the long game. What do I mean? I mean you need to start with small, sustainable goals. Replace soda with seltzer water. Cook at home twice more a week. Pack your lunch for work instead of purchasing it. Eat one extra serving of veggies a day. Give that small goal a few weeks to work its magic and then you add to it. You will be able to maintain all those small goals over time and really make great improvements to your overall health.
Everyone is starting from different points, so I can’t really give tips on nutrition improvements. What I can provide is some tips to help you be successful with your individual nutrition goals.
- Tip 1: Practice Mindful Eating
- It’s a lot easier to stray from your goals if you are not actively involved with what you are eating. If possible, try not to eat while working or distracted with things like television. Enjoy your food and be present. Pay attention to your body while you eat. This allows you to know how you feel eating certain foods and knowing when you are full.
- Tip 2: Incorporate Your Favorite Foods
- Remember, everything in moderation. If you incorporate your favorite foods into your nutrition plan, you will be satisfied with your goals and more successful. There are ways to make your favorite foods healthier as well. If you love pasta or pizza, try different veggie toppings with your favorites to add more food groups.
- Tip 3: Be Kind to Yourself
- It’s a process making change. Don’t punish yourself if a goal isn’t as easy to maintain as you hoped or you lighten up on a previous goal. Remember why you picked those goals, refocus, and keep trying.
- Tip 4: Hydrate
- Hydration often becomes an oversight when thinking about nutrition goals. Proper hydration helps regulate your body. Thirst can also be confused with hunger, so keeping your hydration up will help you know better when you need food.
If you have any questions on this topic, feel free to contact me at mmagunga@healthworksfitness.com or comment below!
TRX Tips
By Molly Magunga, MS ATC, CPT, CES
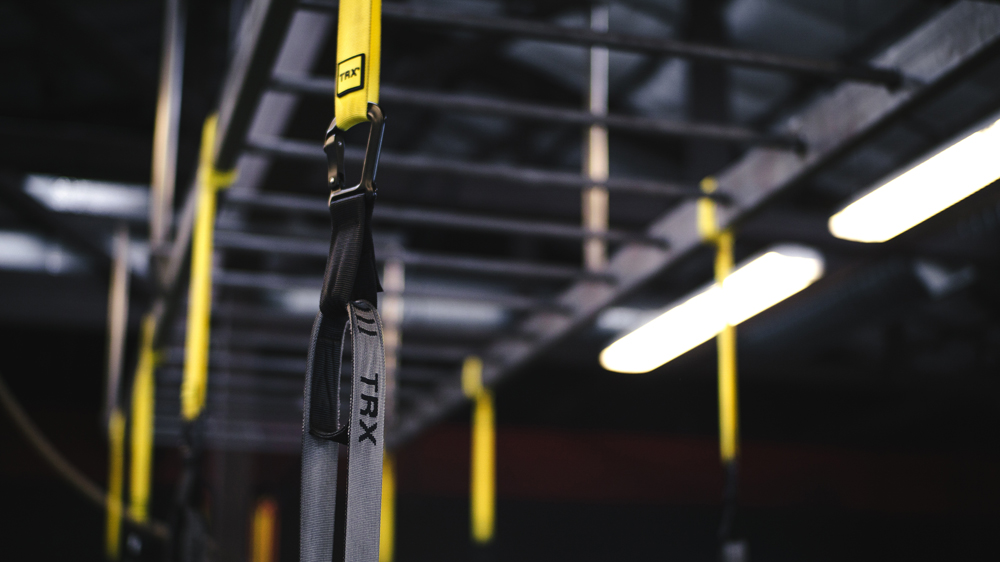
Hello Everyone! This week’s “Fitness Tip of the Week” is about the TRX. The TRX is a suspension training type of equipment meaning it uses gravity and your body weight as resistance. TRX stands for total body resistance exercise. Just because it was invented by a navy seal, does not mean it’s not a great piece of equipment for everyone! This piece of equipment is so versatile. It can be used to assist you through complex movement to ensure proper form or to elevate movements to challenge the body more.
Tips on Set Up
The set up for this piece of equipment is pretty easy. You have two pieces to the TRX: the suspension anchor and the TRX strap. The only complicated aspect is finding a safe and secure place to anchor the TRX to make sure it can withstand your weight without coming loose. Let’s start with the anchor set up.
There are three ways to anchor your TRX. No matter which anchor type you use, you want an overhead mount that is between 7 and 9 feet above the ground. The end of your anchor should be around 6 feet above the ground so when the straps are fully lengthened, they aren’t resting on the ground. Before you begin any exercises, always weight test the TRX and check the equipment for rips or other damage.
Door Mount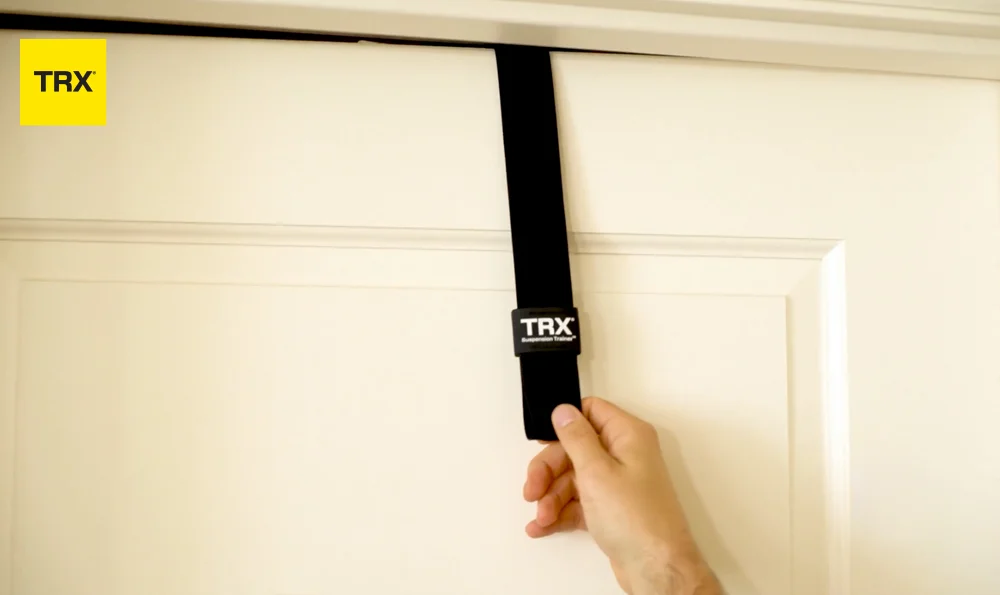 | Carabiner Mount | Wall/Ceiling Mount |
When using the door mount, you want to place the anchor between the door and door frame. You want to make sure the door closes completely. The door should be very sturdy so it can support your body weight. You also want to place the anchor and strap on the side of the door that opens away from you when possible. This will prevent any risk of the door popping open while you are using the TRX. If using this side of the door isn’t possible, place the anchor close to the door hinge for a more secure mount. The great thing about this anchor is that is won’t damage any surfaces and can be used anywhere you find a door.
The carabiner mount wraps around an object and then clips into the bottom loop to secure the strap. You can use the carabiner mount around poles, fences, sturdy tree branches, or bars. You want to be able to wrap the mount around your anchor object several times for a more secure hold. This mount is designed for you to be able to use your TRX on anchor points as high as 9 feet.
The last anchor type is the wall/ceiling mount. This is the only mount that is fixed in place and requires tools to set up. TRX company does recommend professional installation for this mount type. It should only been mounted to studs, beams, or load-bearing walls. When it is installed properly, it is considered the safest mount type and can hold loads up to 750 pounds!
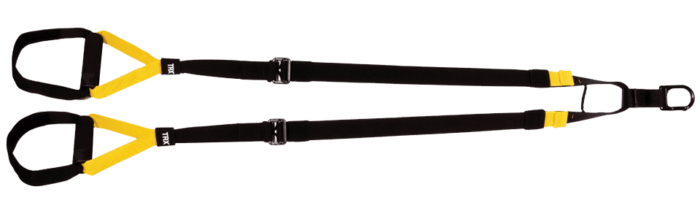
The last set up tip I have for you is about adjusting the strap length. Depending on the exercise, the exact position of the straps will depend partially on your height and how much resistance you want. Generally speaking, for most standing exercises the straps will be at mid length. When doing exercises on the floor, the straps should be 8 to 12 inches off the ground and your shoes usually go in the foot cradle loops. The straps are pretty easy to lengthen and shorten. To lengthen, you press the cam-buckle on both straps and pull down. To shorten, you pull the tab on the strap and pull up.
Tips on Use
There are so many exercises you can do with the TRX. The possibilities are really endless and it would take me far too long to try and break them all down for you. I wanted to finish my post by showing you examples of five main exercise movements. They will all be using both straps, but the TRX is designed to be able to do single leg or arm exercises as well. These five movements are a great way to get started with the TRX. If you want to learn more on using the TRX, TRX-specific classes or a personal trainer educated in using the TRX are great ways to learn more exercises and learn them correctly.
| Squat | Hinge | Low Row | Chest Press | Plank |
 | 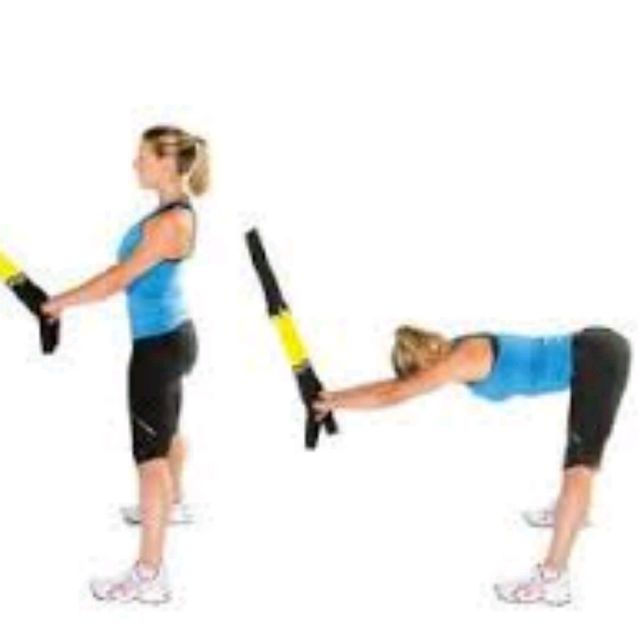 |  | 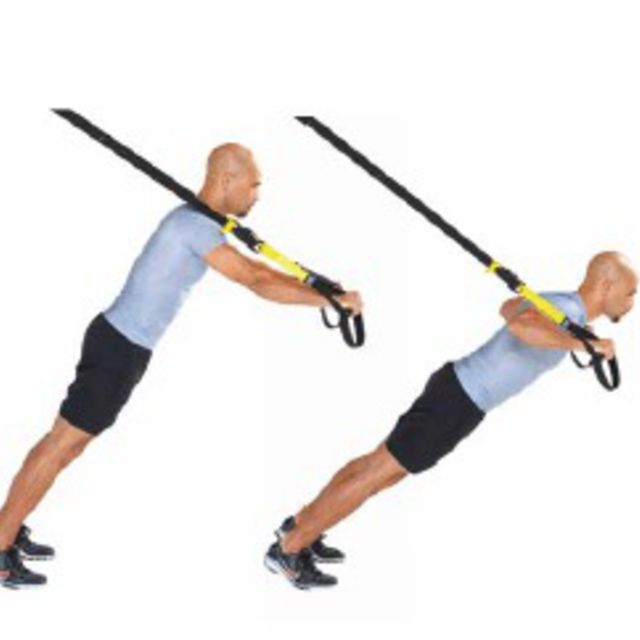 |  |
If you have any questions on this topic, email me at mmagunga@healthworksfitness.com or comment below!
Get to Know Your Quads
By Molly Magunga, MS ATC, CPT, CES
Hello everyone! This week’s “Fitness Tip of the Week” is about the quadriceps. Some people are very familiar with where the quads are and what they do, but a lot of gym goers aren’t really sure. Whether you are an anatomy wiz or not, this post will hopefully provide helpful tips to everyone!
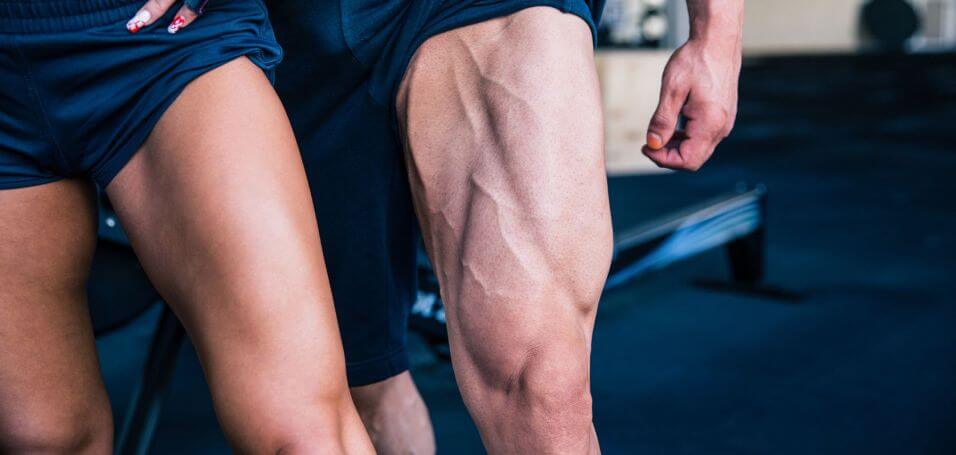
Your quadriceps (quads for short) muscles are the group of muscles on the front part of your upper leg. They are often referred to as your thighs. The “quad” part of quadriceps refers to there being four separate muscles in this group. These muscles are the rectus femoris, vastus intermedius, vastus lateralis, and vastus medialis. All four of these muscles work together to extend or straighten your knee. The rectus femoris is the only quad muscle that crosses your hip joint and helps with hip flexion. They are a very powerful muscles group that helps you squat, lunges, sprint, and sit.

Tips on Quad Flexibility
Keeping your quads loose is so important! Tight quads can cause knee, hip, and/or back pain. Trying to work already tight muscles can also put you at an increased risk for muscle strains or tears. There are a ton of different ways to stretch your quads. If you don’t do much lower body stretching, I like to start with stretch A. By lying on your stomach and using a strap to help pull your heel to your hips, you are able to ensure proper hip and knee alignment and really relax your leg for the stretch. Stretch B involves a hip stretch and allows you to stretch the whole rectus femoris. Stretch C is good for when you have gotten comfortable with form and able to keep hips in a neutral positions all while balancing on one leg.
Along with stretching, foam rolling is also a great tool to use to keep your quads healthy. The foam rolling technique for the quads is pretty straight forward. Picture D below shows the start position. You want to start right above your knee cap and roll all the way up to the hip so you get the entire length of the quads. Roll up and down both with your legs straight and knees bent to help get different depths of the muscles tissue.
A. | B.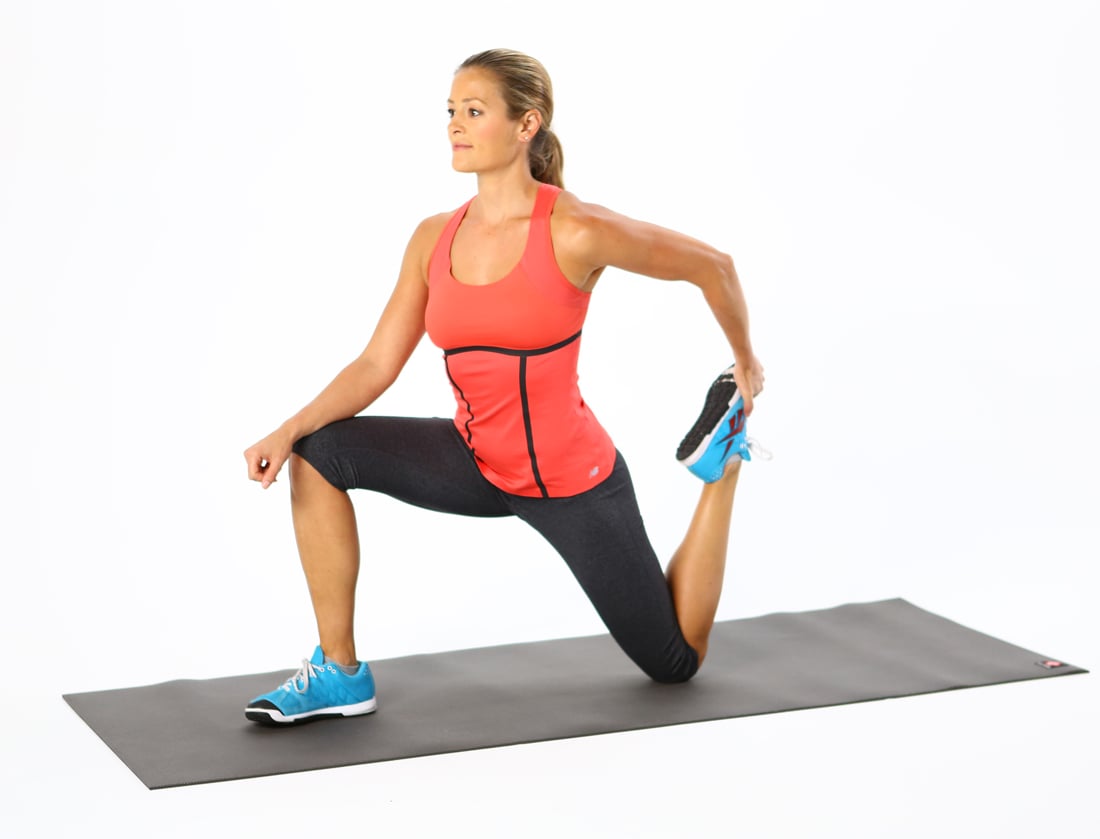 | C./Verywell-30-2696366-StandingStretch-2106-5993552eb501e800127d38d3.jpg) | D. |
Tips on Quad Strength
Weak quad muscles can cause a lot of pain in the body, especially in the knees and hips. Along with straightening the knee, the quads play a huge role in providing knee stability. There are so many exercises that help strength your quads. Squats, lunges, step ups, and leg presses are all great for strengthening exercises. Because the quads all do the same movement, many quad focused exercises will target most, if not all four of the muscles with one move. There are a few exercises with a little more focus on one quad muscle over the others which you can see in the table below.
Big tip: if there is one quad muscle to focus on isolated exercises over the others, it’s the vastus medialis (VMO). This quad muscle plays such a huge part in knee stability and often is the weakest in the group. The other quad muscles have no problem getting big and strong usually. Focus on VMO specific exercises like the one I have below to keep your quads balanced.
Vastus Medialis Focus Straight Leg Raise with external rotation of the foot | Vastus Lateralis Focus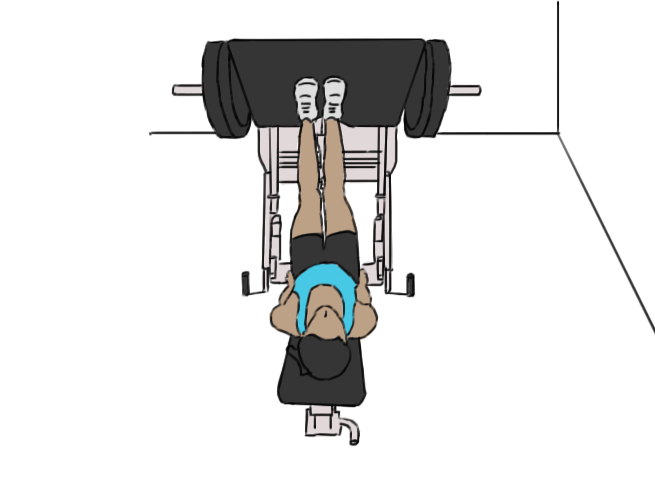 Close Stance Leg Press | Rectus Femoris/Vastus Intermedius Focus Leg Extensions |
If you have any questions on this topic, you can email me at mmagunga@healthworksfitness.com or just comment below!
March Madness Fitness Challenge

By Molly Magunga, MS ATC, CPT, CES
Hello everyone! This week’s “Fitness Tip of the Week” is about March themed workout ideas! March is a fun month! The weather starts warming up. There is still sunlight when you finish with the work day. St. Patrick’s Day breaks up the month. College basketball March Madness begins. With so many events in March, it seems like a great opportunity for some creative workout ideas. Sometimes the best fitness tip is just mixing up the routine with something fun to refresh, refocus, and recommit to working out.
St. Patrick’s Themed Workouts
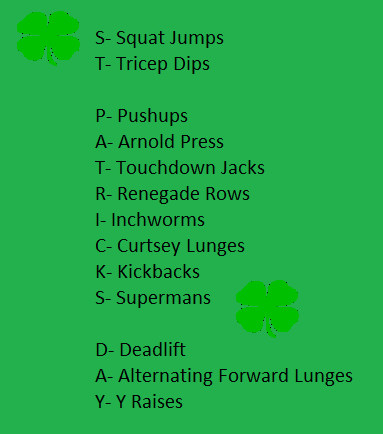
- Luck O’ the Irish
- Using Dice: Assign an exercise for each number on the dice. Make sure you hit every region of the body. I like using squats, bridges, crunches, pushups, supermans, and side lunges as my exercises. Do 10 reps of each exercise. Set a timer for your workout time and roll that dice! Keep rolling the dice until time has elapsed.
- Using a Deck of Cards: Each suit is its own exercise. I like using cardio moves, since it’s only four exercises. Jumping jacks, high knees, burpees, and skater jumps are all great options. Draw a card. The suits determines the exercise. The number on the card is the amount of reps you do. Set a timer for how long you want your workout to be or stop when you draw each card in the deck.
- Lucky 7’s
- Option 1: Strength focused
- Pick your exercises for the day. These can be leg specific, arm specific, or full body. All you do is complete 7 reps of each exercise for a total of 7 sets. Because the repetitions are low for this workout, increase the weight from what you usually lift to really get the most of this workout. Remember that you should start to feel your muscles burn a little at rep 4 or 5 when doing 7 total.
- Option 2: Cardio focused
- Decide on 7 cardio based exercises. You will do as many reps as possible in a minute of a single exercise. Do all 7 exercises like this before you take a short rest. Repeat 4 rounds.
- Option 1: Strength focused
- Spell Out St. Patrick Day
- Each letter of St. Patrick Day represents an exercise that starts with that same letter. Do 12 reps of each exercise and repeat twice.
March Madness Workouts
- Daily Tournament Challenge
- Pick 4 exercises to do each day (squats, burpees, pushups, planks). For the first round of the NCAA basketball tournament, completely 5 reps of each exercise. Increase the exercises by 5 reps for each round, so by the finals you are doing 30 reps of each exercise.
- Coworker or Friend Challenge
- Get a group involved by creating your own fitness bracket. Have a different fitness challenge set for each day. It needs to be something more measureable than just completing a workout. Steps in a day, active minutes in a day, or total distance moved are all great challenges to start with. At the end of the day, the person with the lowest number for the day is eliminated.
- Basketball Game Workout
- While watching the basketball games, assign exercises for certain events. If a player makes a 3-pointer, you do 5 jumping jacks. When a foul is called, you do 5 sit ups. Plank during free throws. 5 burpees for ever dunk. You can make the list as long or short as you want. The goal is to pick enough that you stay moving throughout the whole game!
If you have any questions on this topic email me at mmagunga@healthworksfitness.com or comment below!
Progressing Back into Activity

By Molly Magunga, MS ATC, CPT, CES
Hello everyone! This week’s “Fitness Tip of the Week” is about getting back into activity. There may be many reasons you haven’t been working out a lot lately. Did winter weather condition make running too risky? Did an injury sideline you for a while? Did you just have a baby and recently got a doctor’s clearance to start working out? The reason for your inability to workout does matter on how quickly you can progress back and what you can do to start. If you were unable to workout because of something health related, it’s best to have a profession (your doctor, physical therapist, athletic trainer) determine your best way to progress back into activity. For those who were taking a break from fitness for all the other reasons, this post is a great place for you to get started again.
Tips for Getting Back
It really doesn’t take a very long break to start losing the gains you worked hard to build. In fact, you can start to lose cardio-based fitness in just a matter of days. Muscle mass loss happens a little slower. Research studies have found that you can start to lose muscle mass from not exercising anywhere from 10 day to 3 weeks. The reason for large timeframe is related to age and how you trained prior to taking time off. The good news is these losses are not lost forever. Here are some tips on how to progress back into working out to regain those lost gains and do it safely:
- Start Slow
- Because of how quickly you lose muscle and cardio fitness, you can’t just jump right back in to where you left off. You need to take it slow. If you use to run 6 miles as an average workout, start with a timed interval run where you alternate walking and running for 10 minutes to see how your body feels. If you were incorporating in weights for a high-intensity circuit, reduce the intensity and start with body weight exercises. Start easy and progress from there. Rushing into workouts that are too intense will leave you feeling sore for much longer and could lead to injury, potentially leading to more time off again.
- Listen to your body
- It can be frustrating starting over. Try not to be discouraged with the process. There will be good days and hard days. Listen to what your body needs and accept the process. Trying to rush the process and push the body too hard will only do harm. If your body needs a rest day, give it rest from a workout and stretch instead. If your tank is empty after 10 minutes, accept the 10 minutes it gave you and refuel and rest.
- Warm Ups and Cool Downs
- Proper warm ups and cool downs are always important. They become especially important when progressing back into activity. Working on proper mobility and flexibility can really help reduce the risk of injury and decrease the feeling of muscle soreness. They aren’t “extra” exercises to do if you have time. They are the start and finish to your workouts so when planning your time and workout for the day always make room for them. Your body will thank you.
I have two other posts that really go hand-in-hand with this topic. They are about how to set a fitness goal and how to get into a routine. Both these topics are very important in order to progress back into exercise. In order to make a progression plan, you need a goal to work towards and the fitness goal post will help you with that. Getting started is just one part, consistency is also something you will need to build back. The routine post will give you tips on how to do that.
https://mollysfittip.health.blog/2021/01/21/tips-on-setting-a-fitness-goal/
https://mollysfittip.health.blog/2020/06/19/starting-a-routine/
If you have any questions on this topic, please feel free to contact me at mmagunga@healthworksfitness.com or comment below!
Cable Machine

by Molly Magunga, MS ATC, CPT, CES
Hello everyone! This week’s “Fitness Tip of the Week” is about using the cable machine. If you are unfamiliar with this piece of equipment, it can definitely be intimidating to use. The multiple handles, heights, and angles make it seem more like a torture device than a piece of exercise equipment. I assure you once you learn a little about it, it becomes much less imitating. All the equipment that comes with a cable machine allow you to get a great workout using one piece of equipment.
Cable Machine Breakdown:
Every type of cable machine is a little different. The best tip I can give you when it comes to using these machines is to take the time and explore it. That being said: even with slight differences, many still have similar components. Let’s break those down:
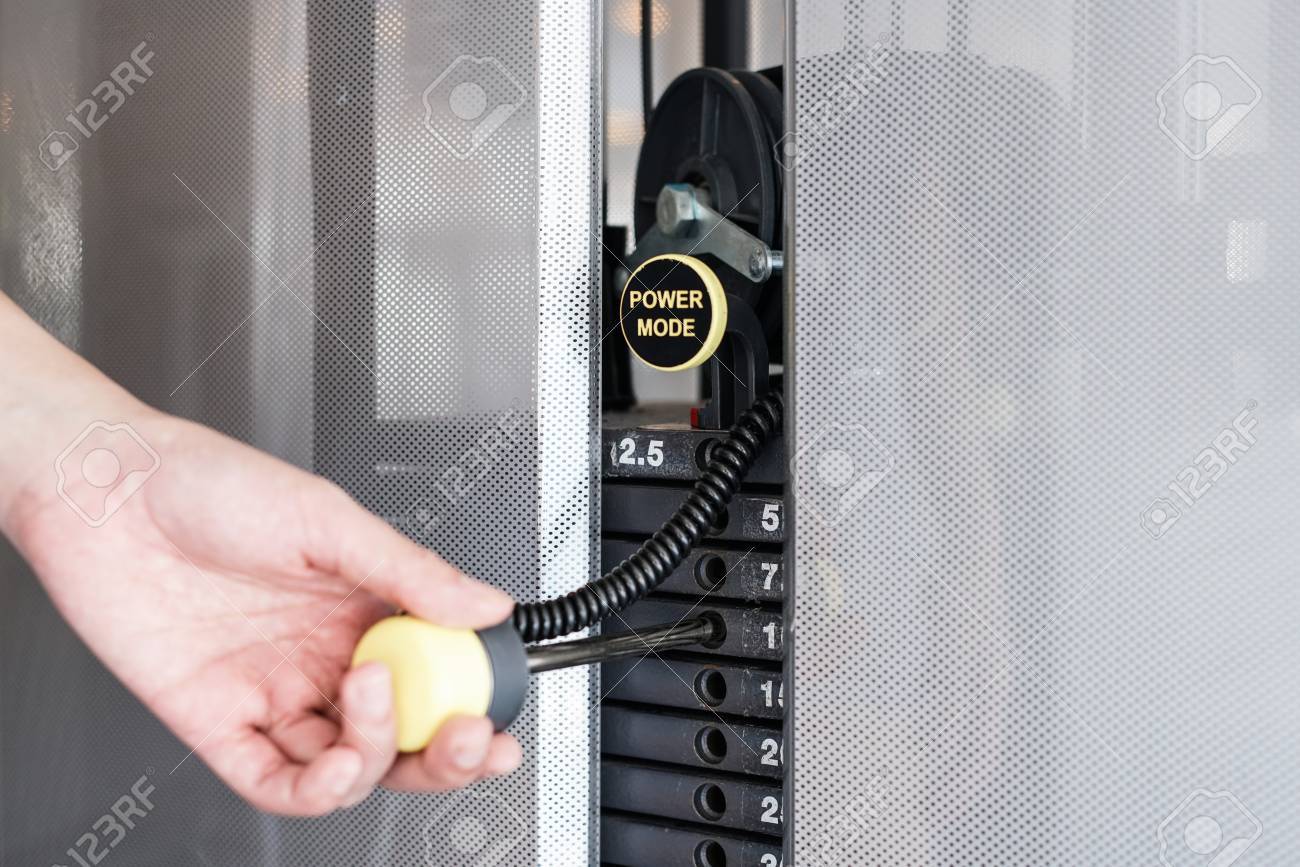
- Stack Weight Set
- A majority of cable machines will have weights build right in. They are labeled in pounds, kilograms, or both. There will be a selector rod attached you can move to select your weight of choice. Some machines have smaller weights you can stack on top of the main stack to do smaller weight increases.
 |  |  |
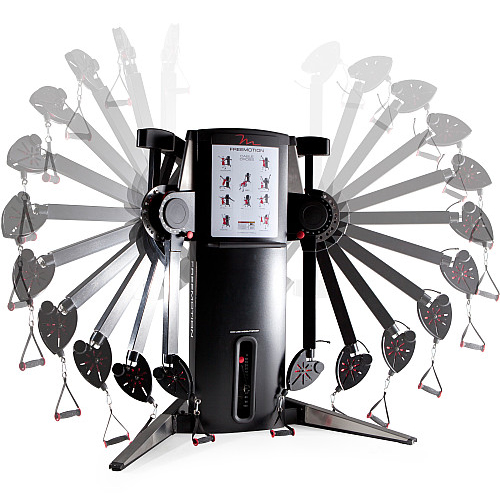
- Adjustable Arms
- Cable machines with adjustable arms allow you to change the angle you are pulling from. There are some exercises (i.e. paloff press or rows) you may want the handle at chest level. Other exercises (i.e. lat pulldown, high rows, low rows) require the angle to be higher or lower.
 |  |
- Attachments
- The bread and butter of the cable machine is the attachments. Changing the attachment allows for different hand placements and the ability to work different muscles. This is where the imagination and research make the cable machine almost unlimited.
 |  |
Cable Workout:
I have provided a starter guide on how to get a full body workout in using just the cable machine. There are so many exercise combinations you can do. The wonderful thing about this machine is that the main limiting factor is your creativity.
| Exercise | Reps | |
| Split Stance Chest Press |  | 10 |
| Side Plank Rows |  | 10 each side |
| Hip Hinge |  | 10 |
| Squats |  | 10 |
| Triceps Pulls |  | 10 |
If you have any questions on this topic, please feel free to email me at mmagunga@healthworksfitness.com or comment below!
Strength Training for Weight Loss
by Molly Magunga, MS ATC, CPT, CES
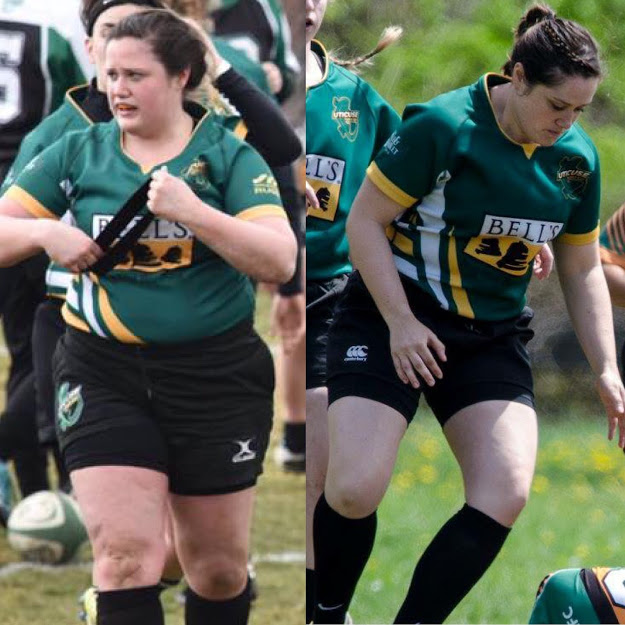
Hello everyone! This week’s “Fitness Tip of the Week” is about strength training for weight loss. This is a topic more personal to me because of my own weight loss journey. There are a lot of misconceptions about strength training, as it relates to weight loss. Strength training isn’t something you need to hold off on until after you get to your goal weight. It’s something to incorporate in now to help you get to your goals. I can speak from experience the success you can see by incorporating strength training into your weight loss plan.
The whole goal of weight loss can be simplified by knowing weight loss occurs, for most people, by burning off more calories than you consume. You can either keep your activity level the same while reduce caloric intake, keep diet consistent while increasing activity levels, or a combination of the two. Now, we all know it’s really not that easy and a lot of other factors, like body type or health issues, complicate matters. For this week’s post, I won’t dive into all the other factors that can affect weight loss and simply focus on the benefits of strength training for weight loss.
So why is strength training important for weight loss and what are these misconceptions about it?
When focusing on weight loss as a goal, many people get caught up with the number on the scale. They think getting stronger will cause them to gain more weight and “bulk up.” First off, how much muscle mass you build is largely based on your body type and how your training is structured. Second, focusing on a scale number rather than actual body composition isn’t the best way to monitor weight loss. The reality is doing strength training helps improve your body composition, look leaner, and lose fat weight. The awesome, fun fact about building more muscle is that muscles use a lot of energy, more energy than fat tissue. This means the more muscle tissue you have, the more calories you burn at rest! This is why you need to strength train if weight loss is your goal. It doesn’t prevent you from reaching your goals; it helps you!
Tips on Strength Training:
Strength training is a very complex form of exercise with many ways to structure programs. So how can you use strength training to help with weight loss? Well, I have a few tips for you.
- Challenge yourself
- Don’t be afraid to use weights that feel heavier to you. If you don’t feel much muscle work happening through an entire set, the weights are too light. As long as your form is correct through the whole set, challenge yourself with the weights you use. You won’t bulk up just because you pick up weights.
- More Repetitions
- Incorporate in higher repetitions of an exercise to really feel the burn. Higher reps challenge your muscle endurance, which depletes more energy and creates lean muscle development.
- Use Complex Movements
- Picking exercises that use multiple muscle groups is a great, time-saving trick to burn more calories during your workout. The more muscles working, the more energy burned.
- Big lifts are Important
- Big lifts like squats, deadlifts, bench, or pushups are really important to a weight loss strength program. Big lifts are called that, because they involve large muscle groups and require a lot of energy to complete.
- Cardio and Weights Together
- You shouldn’t pick between cardio or weight training when developing a weight loss plan. Variety helps prevent plateaus and the deplete energy in different ways.
- Nutrition Importance
- No fitness plan is complete without nutrition incorporated in. Besides the calorie consumption component, macronutrients are so important with exercise. Muscles need protein. It’s their bricks. You can’t build or repair muscle tissue without it.
If you have any questions on this topic, please feel free to contact me at mmagunga@healthworksfitness.com or comment below!
Intro to Nutrition: Macronutrients

by Molly Magunga, MS ATC, CPT, CES
Hello everyone! This week’s “Fitness Tip of the Week” is about macronutrients. The results you see inside the gym are hugely impacted by what you are putting in your body throughout the day. Regardless of your fitness goals, nutrition is a key component to success. A well-balanced diet of what your body needs is like a tool box for your body. It will have everything it needs to build, repair, and make things work!
There is no way I can break down all the ins and outs of nutrition in one weekly tip, but I think starting with the basics is a good start. By basics, I mean our macronutrients. No matter your goals, every diet starts with how much of each macronutrient you need. There are three in total and they are carbohydrates, fats, and proteins. None of these categories are considered “bad” or off limits. Your goals dictate how you use each of these. Your diet isn’t complete if you aren’t consuming all three on a daily basis.
Protein:
Your body uses protein as the building blocks within your body. One analogy I like to use to describe how your body uses protein is to think of building a brick house. Your muscles are the finished product, but the protein is the actual bricks. You won’t be able to build a complete house using just mortar. You need the bricks for structure. Protein helps your body build all types of tissue and repair it when it becomes damaged. Often times, we think of our main protein sources as animal based in nature (i.e. steak, chicken, tuna, etc), but there are a lot of great plant based proteins (I.e. soy, lentils, chickpeas, nuts). Any type of physical activity involves muscle work, which means you need protein to help keep your muscles healthy.
Carbohydrates:
It shouldn’t be a surprise that carbohydrates (carbs for short) have the worst reputation of the three macronutrients. The main reason carbs have a bad reputation is they tend to have more calories per serving than proteins, fruits, or vegetables. If you are trying to lose or maintain weight, carbs are usually the macro we are told to lessen to accomplish that, because it cuts out the most calories. They are still a very important macro to have in our diet. Have you ever noticed on days you haven’t gotten enough sleep or are more tired than usual, you tend to crave carbs? Our body craves carbs because they are how our body gets energy. Carbs are the easiest macro for the the body to breakdown and use for energy. They are so important to fuel every system in our bodies, which is far from a “bad” macro.
Fats:
This is another macro that gets a bad name as well. You may be thinking: I’m trying to decrease my body fat percentage, why do I need fats? Well, healthy fats help regulate your metabolism and help with vitamin absorption. The key to nutrition is everything in moderation. Adding a little avocado, olive oil, or nuts to a dish for flavor is all that is needed to keep you body working optimally. The biggest thing to know about this macro is that there are healthy fats and unhealthy fats. Unhealthy fats can be hard on your heart and increase your risk for heart disease. For more information on healthy and unhealthy fats, check out my heart health post from the beginning of this month.

Again, your body and your fitness goals have a lot of influence as to what your personal diet would look like. There are tons of recommendations out there, but working with a professional is the best way to know you are on a good and healthy track to your goals. Life is all about balance, so knowing the right balance for you and your body is all you need to be successful.
If you have any questions on this topic, please feel free to contact me at mmagunga@healthworksfitness.com or comment below!
Tips on Using Sliders
by Molly Magunga, MS ATC, CPT, CES
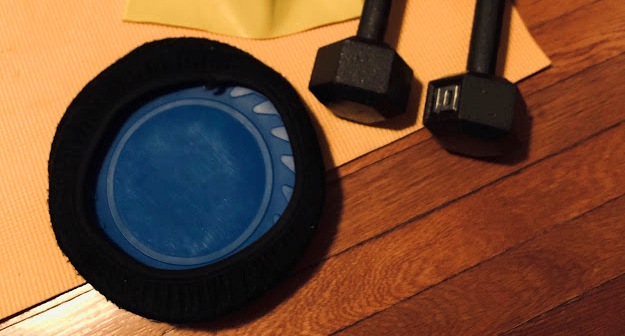
Hello everyone! This week’s “Fitness Tip of the Week” is about sliders. If you are looking to elevate your strength training routine, sliders are an awesome way to do that. When you change your training surface, your body must adapt in new ways. Small muscles that usually don’t have to work as hard in your day-to-day workouts become very important when unstable training surfaces are used. When you increase your strength using an unstable surface, you become significantly stronger on solid ground.
Think about the way you normally walk. Usually, a normal walking gait doesn’t require much thought at all. You put one foot in front of the other and stroll along on your merry way. Now, think about how you walk on an icy surface, like a sidewalk. Your whole walking gait changes. Your pace slows, your core engages more, and you stabilize each leg before moving to the next. Each step is methodical. I spent four years walking across freshly Zambonied ice and can speak first hand to the sweat and muscle burning that occurs when every muscle is working to stabilize you. Your body reacts in a similar way to sliders. Sliding into a lunge requires much more stabilization within your core, hips, and legs than a standard lunge.
Slider Safety Tips:
One key thing to remember, get used to the movements first before adding the sliders or weights. Be confident in the movement, then add the sliders. When you are comfortable with the sliders, you can begin to challenge yourself by adding different types of resistance. Weights are a great way to start. If you are comfortable with the weights and sliders, I love adding resistance bands to the mix for an added challenge. The possibilities are endless!
Slider Workout Tips:
Below, you will see how different strength exercises can be done using sliders. With a little creativity, most exercises can be used with sliders. Have fun!
Squats | Hamstring Curls |
Reverse Lunge | Mountain Climbers |
Side Lunge | Side Plank Knee-to-Elbow |
Curtsey Lunge | Pushups |
If you have any questions on this topic, please feel free to contact me at mmagunga@healthworksfitness.com or comment below!
